Project setup for WeMos D1 Mini
Let’s start off with configuring a PlatformIO project for Wemos D1 mini.

then, let’s use a simplest blink example as usual and build the code.
#include <Arduino.h>

void setup() {
  pinMode(LED_BUILTIN, OUTPUT);
  Serial.begin(9600);
}

void loop() {
  Serial.println("OK");
  digitalWrite(LED_BUILTIN, HIGH);
  delay(1000);
  digitalWrite(LED_BUILTIN, LOW);
  delay(1000);
}
Note: most likely the first compilation will take a while, as you will need to download all the libraries and tools required to work with ESP8266 if you don’t have them yet in your system.
Let’s upload and verify - the LED should be blinking, and on uart monitor you should see “OK” every two seconds.
Connecting ESP8266 to WiFi
Now, let’s connect the ESP8266 chip to the workshop WiFi network. To do that - let’s first add an include and two defines at the top of the code:
#include <ESP8266WiFi.h>
#define WIFI_SSID "workshop"
#define WIFI_PASSWORD "workshop"
Then, let’s add a function to configure network connection:
void setup_wifi() {

  delay(10);

  Serial.println();
  Serial.print("Connecting to ");
  Serial.println(WIFI_SSID);

  WiFi.begin(WIFI_SSID, WIFI_PASSWORD);

  while (WiFi.status() != WL_CONNECTED) {
    delay(500);
    Serial.print(".");
  }

  randomSeed(micros());

  Serial.println("");
  Serial.println("WiFi connected");
  Serial.println("IP address: ");
  Serial.println(WiFi.localIP());
}
And let’s call that connection in setup:
void setup() {
  pinMode(LED_BUILTIN, OUTPUT);
  Serial.begin(9600);
  setup_wifi();
}
Let’s build, upload and verify. You should see in the serial output that the device has connected to the network.

Connection to an MQTT broker
Now let’s use MQTT to send and receive messages. We will need more includes and defines first:
#include <PubSubClient.h>
#define MQTT_SERVER "broker.emqx.io"
#define SENSOR_NAME "workshop/test1"

WiFiClient espClient;
PubSubClient client(espClient);
Note: most likely you would like to update the SENSOR_NAME with something of your own, any channel name will do.
Then we can write a function that will (re)connect with the broker.
void reconnect() {
  // Loop until we're reconnected
  while (!client.connected()) {
    Serial.print("Attempting MQTT connection...");
    String clientId = "client-";
    clientId += String(random(0xffff), HEX);
    if (client.connect(clientId.c_str())) {
      Serial.println("connected");
      client.publish(SENSOR_NAME, "hello world");
      client.subscribe(SENSOR_NAME);
    } else {
      delay(5000);
    }
  }
}
We will also need a callback function to handle incoming messages:
void callback(char* topic, byte* payload, unsigned int length) {
  Serial.print("Message arrived [");
  Serial.print(topic);
  Serial.print("] ");
  for (int i = 0; i < length; i++) {
    Serial.print((char)payload[i]);
  }
  Serial.println();
}
And finally let’s update the setup and loop accordingly:
void setup() {
  Serial.begin(9600);
  setup_wifi();
  client.setServer(MQTT_SERVER, 1883);
  client.setCallback(callback);
}
void loop() {
  if (!client.connected()) {
    reconnect();
  }
  client.loop();
}
The idea is that we will reconnect with MQTT if we are not connected already. the client.loop() has to be called in the main app loop to handle incoming messages.
Testing MQTT connectivity
Let’s use an online tool to verify that our board has logged in and sent the first initial message.
Open in your browser: http://tools.emqx.io/
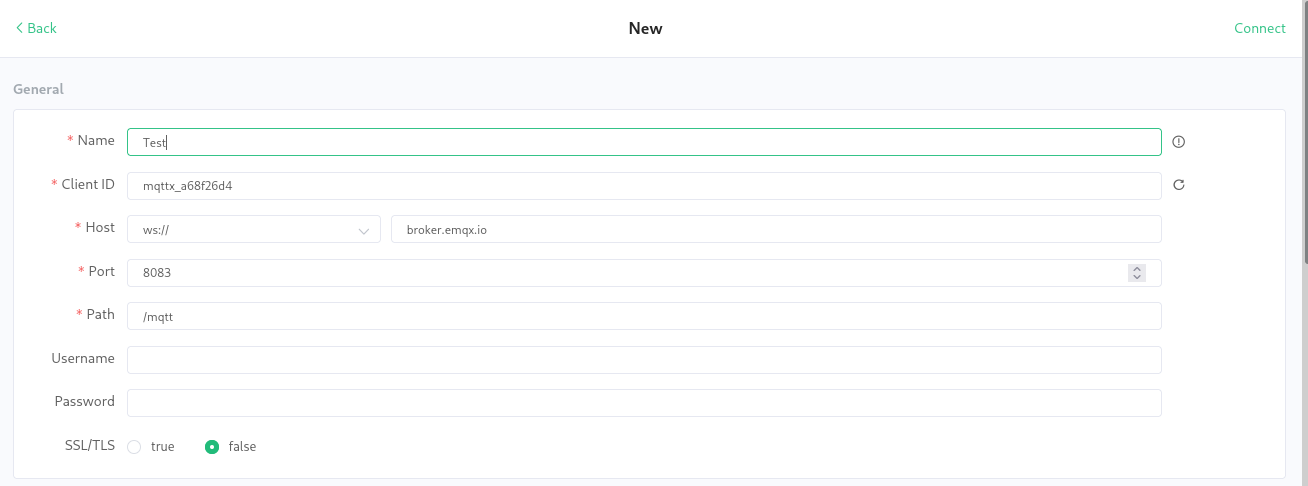
With the default settings open up a new connection with the broker:
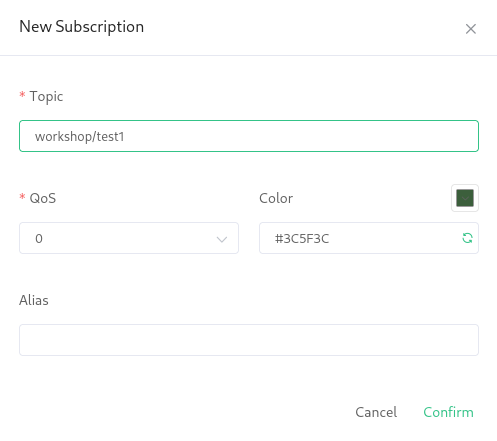
Then add a subscription to your topic:
And then finally upload the code to your board, or just reset it if you’ve already uploaded.

You can as well send a message back to the device. In the window on the bottom on the screen:
- change the payload format to plaintext
- enter your channel name
- enter any text and press send

Verify the serial output on the device to see if the message has been successfully received:

There is also an alternative tool with the same purpose: http://www.hivemq.com/demos/websocket-client/
Sending sensor data over MQTT
Now you should be able to send some sensor data over MQTT. You could figure out how to connect the DHT11 or some other sensor and send the data over MQTT.
Note: don’t use blocking delays as it would interfere with the PubSub and WiFi stack internal code.
Recommended is the asynchronous approach like:
uint8_t i = 0;
unsigned long lastDataSent = 0;
void loop() {
  if (!client.connected()) {
    reconnect();
  }
  client.loop();
  if(lastDataSent + 10000 < millis()){
    // read the data from the sensor
    // client.publish(topic, data);
    lastDataSent = millis();
  }
}
Receiving data over MQTT
To control anything in your board over MQTT you can just add relevant code to the MQTT callback, similarly to what you’ve done earlier with the UART inputs from your computer or phone.
Note: as you might subscribe to multiple topics, strcmp function might be useful.
Example:
if(strcmp(topic, "yourName/LightSwitch") == 0){
    if ((char)payload[0] == '1') {
      digitalWrite(LED_BUILTIN, HIGH);
    } else {
      digitalWrite(LED_BUILTIN, LOW);
    }
  }
Another tip: if you need to send any numeric data as text, you could make use of the following conversion:
String(temperature).c_str()
that makes a String from a number (int or float), and then returns a standard c style buffer pointer terminated with a \0.
Next steps
OK, if you can send and receive MQTT messages - let’s see how can we create some automation in the cloud with Node-RED